
How to Build a Home Emergency Kit That Handles Serious Trauma
Last Updated: November 15, 2026
Quick Summary
Build an emergency kit around the risks your household actually faces, then add a waste plan for sharps, blood-contaminated dressings and expired medications. Stock bleeding control, wound cleaning, protection and documentation items, store the kit cool and dry, and check it every three months.
- Map who lives in the home, ambulance distance and property activities before buying supplies.
- Keep sharps, infectious waste, pharmaceutical waste and ordinary waste in four separate streams.
- Never place sharps or blood-contaminated waste in kerbside bins or general recycling.
- Keep a tourniquet on top of the kit and note the application time once bleeding stops.
- Store the main kit centrally plus a smaller kit in each vehicle, and check it every three months.
Table of Contents
- Start With the Risks Your Household Actually Faces
- Home Emergency Trauma Kit Checklist: What Goes In
- First Aid Kit vs Trauma Kit: Knowing Which to Reach For
- Building a Bleed Control Kit That Works Under Pressure
- Trauma Kit Storage and Maintenance: Keeping It Ready
- Common Mistakes That Undermine a Home Emergency Kit
- Choosing Your Kit and Refills From PFA Shop
- Frequently Asked Questions
Start With the Risks Your Household Actually Faces
An emergency kit is only as good as its match to your household, so begin by mapping the incidents most likely to happen and the waste each one generates. A family with toddlers faces choking, scalds and used dressings.
A basic kit bought years ago, never checked, and missing the one item that mattered is a common gap in home preparedness. Without a plan for disposing of contaminated items safely, even a well-stocked kit leaves a household exposed.
Start with four questions:
- Who lives here, and what are their ages and health conditions?
- How far is the nearest hospital or ambulance response?
- What activities happen on the property, from DIY to trail riding?
- What waste will each likely incident produce, and where will it be stored and disposed of?
A Medical-Waste Workflow for the Home
A simple workflow from point of generation to disposal helps households manage first aid waste:
- Generate and contain. At the point of injury, place sharps directly into a rigid, puncture-resistant sharps container. Never recap a needle. Place blood-soaked dressings in a double-bagged, leak-resistant bag.
- Segregate. Keep three streams separate: sharps, infectious or blood-contaminated waste, and ordinary waste. Pharmaceutical waste, including expired medications, is a fourth stream and should never go in the bin or down the sink.
- Store securely. Use a lidded, labelled container out of reach of children and pets, away from food preparation areas and direct sunlight. Outdoor storage needs to be weatherproof and animal-proof.
- Arrange collection. Check with your local council or a licensed waste service about accepted household clinical waste, sharps drop-off points and medication return options. Requirements vary by location, so verify approved containers, transport and documentation before you need them.
- Document and review. Note what was used and how it was disposed of, then restock and review the plan.
Watch out: placing sharps or blood-contaminated waste in general recycling or kerbside bins creates a serious handling risk for waste workers and can breach local waste rules.
Waste-Stream Decision Guide
Use these practical distinctions when sorting items after an incident:
- Sharps: needles, lancets, broken glass contaminated with blood. Rigid container only.
- Infectious or blood-contaminated waste: gauze, dressings, gloves with visible blood. Double-bag and keep separate from ordinary waste.
- Pharmaceutical waste: expired or unused medications. Return to a pharmacy take-back scheme where available; never flush.
- Ordinary waste: packaging, non-contaminated gloves, paper. Normal bin.
If you are unsure, treat the item as contaminated and keep it out of the general waste stream until you can confirm local rules.
Outdoor and Temporary-Site Contingencies
If your kit is used at a campsite, worksite or temporary outdoor setting, plan for conditions a home cupboard does not face:
- Wind and rain can scatter lightweight waste; use weighted, lidded containers.
- Heat degrades dressings and adhesives; store in a shaded, insulated location.
- Uneven terrain and limited vehicle access affect how you move waste to a collection point.
- Without permanent water or power, include hand sanitiser, sealed water for wound cleaning and a battery torch.
- Secure storage matters where children, pets or wildlife can reach containers.
Sharps Injury and Spill Response
A concise incident procedure belongs with the kit:
- Wash the wound with soap and water, or flush a splash to the eyes or mouth.
- Encourage bleeding under running water for a needlestick, then cover the wound.
- Record the time, item and circumstances.
- Seek medical advice promptly; post-exposure assessment and any testing are time-sensitive.
- Report the incident through your workplace or household safety process and review how the item was handled.
For a spill, contain the area, wear gloves, absorb the liquid with disposable material, clean with detergent and water, and bag all contaminated material for the infectious-waste stream.
Compliance Checklist
Rules vary by location and waste type, so verify rather than assume:
- Confirm local council or state guidance on household clinical waste and sharps disposal.
- Identify approved sharps containers and whether they are accepted at drop-off points.
- Check whether a licensed service is required for collection and transport.
- Confirm documentation or labelling requirements.
- Identify pharmacy take-back options for expired medications.
- Record the disposal route in your household plan and review it annually.
Quantities, Staffing and Service Planning
For larger households or temporary sites, estimate before you buy:
- Count likely incidents per month and multiply by average dressings and gloves used per incident.
- Allow at least one spare sharps container and one spare infectious-waste bag per kit.
- Match collection frequency to storage capacity; do not let full containers sit.
- Assign one person to check stock and arrange disposal, with a backup.
A kit that includes a waste plan is the one that stays safe after the emergency, not just during it.
Home Emergency Trauma Kit Checklist: What Goes In
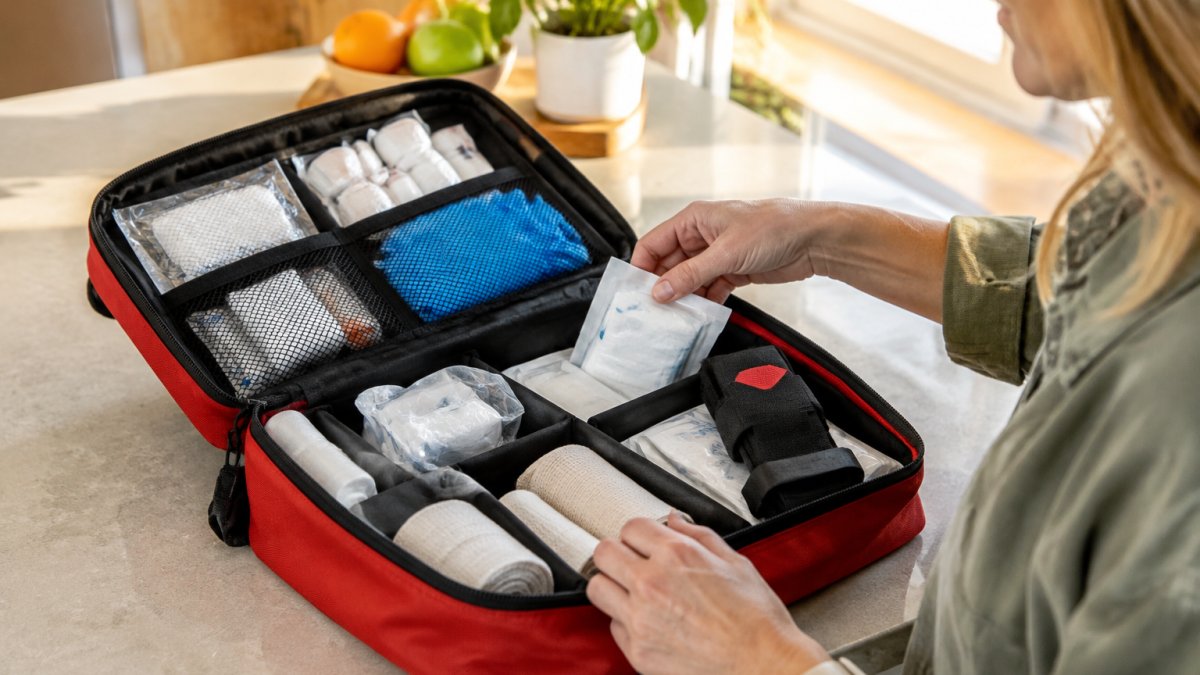
A home emergency trauma kit checklist should cover bleeding control, wound cleaning, protection and documentation, not just bandages. The exact contents scale with your risk assessment, but the categories stay the same.
Core Wound Care and Bleeding Control Items
This is the heart of the kit. Stock generously here:
- Sterile gauze swabs in several sizes
- Trauma dressings for heavy bleeding
- A tourniquet and a marker pen for the application time
- Elastic bandages and crepe rolls
- Adhesive dressings for minor cuts
- Antiseptic wipes and saline for wound cleaning
- Burn gel dressings
- A foil emergency blanket for shock
For a closer breakdown of what belongs in a dedicated bleed control pack, see our guide to the best bleed control kit components.
Tools, Protection and Documentation
The supporting items are what let you work safely:
- Disposable gloves, several pairs
- Trauma shears and tweezers
- A CPR face shield
- A torch with spare batteries
- A first aid manual and an incident notebook
- A list of emergency contacts and each household member's medications
First Aid Kit vs Trauma Kit: Knowing Which to Reach For
The difference between a first aid kit and a trauma kit is scope, not quality.
Most homes need both, and they should live in the same cupboard. Reach for the first aid kit for a kitchen cut.
If you are weighing up specific options, our comparison of bleeding control kits for trauma covers what to look for before you buy.
The two kits differ in scope, not quality, and most homes should keep both in the same cupboard.
| Kit type | Handles | Key contents | When to reach for it |
|---|---|---|---|
| First aid kit | Everyday injuries: cuts, grazes, sprains, minor burns | Dressings, bandages, adhesive dressings | A kitchen cut |
| Trauma kit | Life-threatening bleeding and airway emergencies | Tourniquets, haemostatic dressings, chest seals | Bleeding that will not stop with direct pressure |
Building a Bleed Control Kit That Works Under Pressure
A bleed control kit must be simple enough to use when your hands are shaking. That means fewer items, clearly grouped, in a case you can open one-handed.
- Keep the tourniquet on top, not buried
- Group items by job: stop bleeding, clean, cover, protect
- Practise opening the kit and applying a tourniquet on a limb
- Replace anything you use immediately
Watch out: a tourniquet left loose does more harm than good. Tighten until bleeding stops, note the time, and get medical help.
Trauma Kit Storage and Maintenance: Keeping It Ready
Storage and maintenance decide whether your kit works on the night you need it. Heat, sunlight and moisture ruin dressings and degrade adhesives, so pick a cool, dry, dark spot that is easy to reach.
Where to Store It and How to Check It
Keep the main kit in a central, known location, plus a smaller kit in each vehicle. Check it every three months:
- Confirm every item is present and sealed
- Check expiry dates on dressings, wipes and gels
- Test the torch and replace batteries
- Check gloves for perishing
- Review the contact and medication list
For a repeatable system, see how to track first aid expiry dates. If restocking by hand keeps slipping, a first aid kit refill service takes the guesswork out of it.
Common Mistakes That Undermine a Home Emergency Kit
The most common mistake is buying a kit and never opening it. A sealed box in a cupboard is not preparedness; it is an unverified assumption.
Other frequent errors:
- Storing the kit somewhere hot, like a shed or car boot in summer
- Buying one kit for a large household and running out of gloves
- Skipping training, so nobody knows how to use the tourniquet
- Forgetting to restock after a minor incident
- No kit in the car at all
A common mistake is treating the kit as a purchase rather than a routine. The households that stay ready are the ones that check on a schedule.
Choosing Your Kit and Refills From PFA Shop
Choosing a kit comes down to matching the case and contents to your household, then committing to a refill routine.
The AEROKIT 2 Series First Aid Softpack is a starting point for home and personal use at $29.99. It has a durable soft case with a belt loop, organised internal compartments, easy pull zippers, latex-free contents and a reflective strip for low-light visibility. It is stocked with dressings, bandages and specialised items for cuts, grazes, trauma, eye injuries and burns, and individual refills are available.
If you are ready to shortlist, browse our essential home trauma kit options and build the kit your household actually needs.
The gap between a household that copes and one that panics usually comes down to one checked kit in a known place. PFA Shop supplies first aid kits, AEDs and emergency medical equipment with the refills to keep them current, so your kit is ready when it counts.
Frequently Asked Questions
What should be in a home emergency trauma kit?
A home emergency trauma kit should cover severe bleeding and wound care first: gauze dressings, trauma bandages, a tourniquet, medical tape, shears, gloves and a CPR face shield. Add a thermal blanket, a torch, and a written list of emergency contacts. Keep everyday items like adhesive dressings and saline in a separate first aid kit so the trauma kit stays focused. Check every item against the manufacturer's instructions and replace anything used immediately.
What is the difference between a first aid kit and a trauma kit?
A first aid kit treats everyday injuries such as cuts, grazes, burns and sprains, and suits homes, cars and small workplaces. A trauma kit is built for life-threatening bleeding and serious wounds, so it carries haemostatic dressings, tourniquets and chest seals rather than plasters and bandages. Most households need both. The first aid kit handles the majority of incidents, while the trauma kit sits ready for the rare event where minutes matter.
How often should I check and replace trauma kit supplies?
Check your trauma kit every three months and after any use. Look for expired sterile packaging, damaged seals, and items that have been opened or removed. Tourniquets and haemostatic dressings are single-use, so replace them once used, even if they look intact. Set a calendar reminder for the same date each quarter, and write the next check date on the kit itself so anyone in the household can see when it was last inspected.
When should I call Triple Zero (000) for a serious injury?
Call Triple Zero (000) for uncontrolled bleeding, a suspected head or spinal injury, breathing difficulty, chest pain, burns larger than a hand, or any loss of consciousness. Start first aid and bleed control straight away while someone else makes the call. Give the operator your address, what happened and the person's condition, and follow their instructions until paramedics arrive. Do not delay the call to finish treating the injury.
